Guide: R Series Firmware Update
Table of Contents
Note
Firmware updates are generally only done when upgrading the battery. This makes sure that the battery gauge is still accurate with the new larger battery.
Needed Parts and Supplies
- Windows Computer (XP, Vista, 7, 8, 8.1)
- Mini USB Cable – Example
- Your Optibike R Series Bike
- Firmware update utility – download here
- Firmware update file – these are specific to each model of bike, please click “Contact Support” at the top of the page to send us an email with your info.
Step 1: Extract ZIP File
Extract the ‘Optibike_SW_Upgrade_Utility.zip’ file to your Desktop or another easy to access folder
Step 2: Drivers
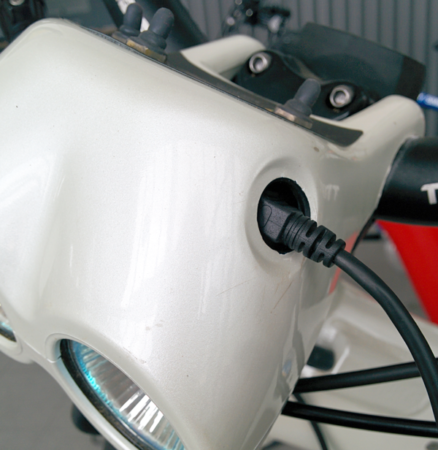
Using the Mini USB cable, connect your Optibike to your computer, the USB port is located under the small round black cover on the left side of the Optibike Headlight
On recent versions of windows (Vista, 7, 8, 8.1) the drivers should be installed automatically and you can move on to Step 3
Manual Driver Installation for Windows XP, or if drivers did not install on any version of windows:
Right Click on the ‘Optilink Drivers.exe’ file and then click “Run as Administrator” to start the driver installation (Windows XP may not have the Run as Administrator option, in which case you can open the file normally)
Once the window opens click the “Extract” button, then on the next window click the “Next” button, and then the “Finish” button
After the driver install has finished, disconnect and reconnect the Optibike to your computer
Step 3: COM Port
If you know how to find the number of the COM port you may skip this step
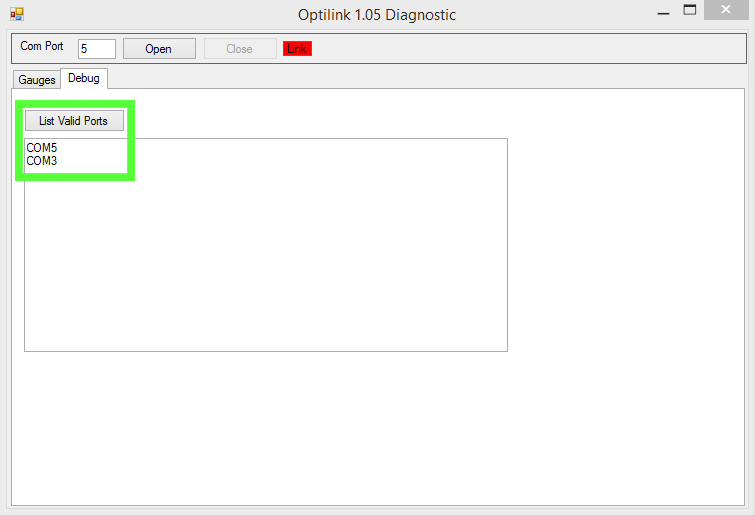
Open up the ‘Optilink.exe’ program, and switch to the “Debug” tab, then click “List Valid Ports”
If there is more than one port the Optibike will typically be the highest numbered port
Step 4: Updating
Open up the ‘PICbootPlus.exe’ program, you can ignore any errors that pop up when opening the program

Important: At this point turn the Power switch on the Headlight to the Down (Off) position, and turn the Battery selection switch under the seat to the Middle (Off) position
Step 1: Click the “Search” button and select the firmware update file you received from us for your bike (if you do not have one, fill out the form at the top of the page)
Step 2: Check the “EEPROM” box
Step 3: Enter the COM port number that you obtained in Step 3: COM Port (only enter the number, the ‘COM’ prefix is not needed), then click the “Change Port” button
Step 4: Click the “Write” button, and then turn the Battery selection switch under the seat to the Forward position (push switch towards the front of the bike)
You should see the progress bar start to fill in the Pic Bootloader program
Once the progress bar is done, you can disconnect the USB cable and use the bike as normal