Charging your Optibike R Series
Contents:
When to charge
Anytime!
The lithium battery in the Optibike can be charged at any time without affecting the lifespan of the battery
We recommend that you plug your bike in when you get back from a ride so it’s topped off and ready to go for next time
You can also disconnect the charger at any time during the charge without causing any damage to the battery
Connecting the charger
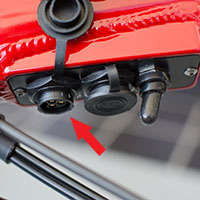
When getting ready to charge your Optibike, make sure that:
- The switch on the relay board is forward
- The headlights are turned off
- The charger is turned off with the switch on the back of the unit
You can now connect the charger to the Optibike
Take the charger cord with the round 3 pin connector on the end and plug it into the charger port on the relay board (this is under the seat area with the switch and 2 connectors)
Now switch on the Optibike with the power switch on the headlight, and then switch on the charger with the power switch on the back of the unit
If charging has started successfully the LED on the charger will turn from green to orange, and after a few seconds the LEDs on the headlight will start to cycle
The LEDs and what they mean
Charger:
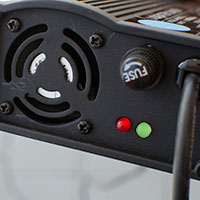
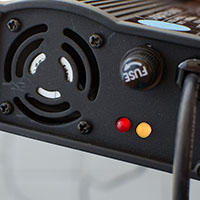
The charger that comes with your Optibike has 2 LEDs on the front
The red one on the left indicates that the charger has AC power and is turned on with the switch on the back
The LED on the right is multicolored, this is the charge indicator:
Orange – this means that it is currently charging the bike (on some chargers this may be red instead of orange)
Green – this means that it has completed charging the bike and you can disconnect the charger
Optibike Headlight:
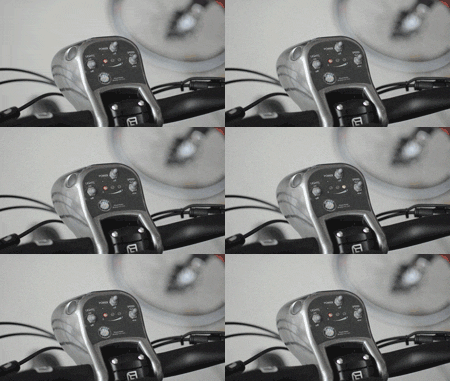
Once the Optibike is charging, the LEDs on the headlight will start to cycle
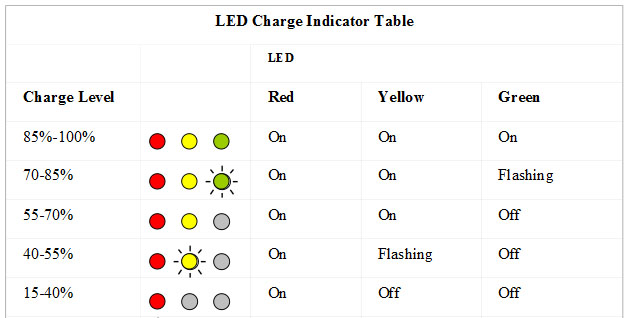
The steady LEDs that are lit in between cycles indicate the charge level of the battery, the bike in the example animation has just come back from a ride and the charge level is very low (red led lit)
Charging is complete once the LEDs stop cycling or turn off completely
See the table below to determine the charge level of the bike
Balancing your battery
If the range on your Optibike has declined over time, the battery may need to be balanced
It is recommended that you first contact Optibike to make sure that balancing is needed
The first step is to fully charge the Optibike
Once charged you will need to drain the battery for a few minutes either by riding the bike 1-2 miles, or by leaving the headlight on for 20-30 minutes, once that is completed you can then reconnect the bike to the charger and let it charge until the headlight LEDs turn off and the charge indicator LED on the charger turns green
This process may need to be repeated several times to fully balance the battery